Guides
How to Enable Hidden VLC Media Player’s Skin

If you don’t know about this little amazing player yet, then I’d suggest to give it a try once. You’ll definitely love it!
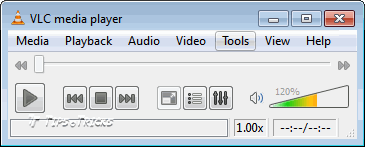
Well, if you’re already using VLC media player, then you must know that it comes with a seriously dull skin that looks like classic Windows theme. And if you don’t know then let me tell you that VLC supports skins too. Yes, it does!

Because of non friendly customization and preferences options, users normally hesitate to go to that preferences menu of VLC. But if you be careful and play nice after entering to that options panel you’ll notice there’s an option to apply skins. And interestingly after version 1 and onwards VLC included a skin file with the setup.
When it was launched there was no support of skins for VLC. But as it evolves and improves with time, skins were introduced by developers and a separate page for skins was launched at VLC’s official site where users can upload there self made skins just to show love for VLC.
But when you install you’ll still see that default skin, and I’m here to tell you how to enable the hidden theme that comes with new VLC Player and also How to apply new skins to VLC media player.
So here we go:
1. Open VLC media player
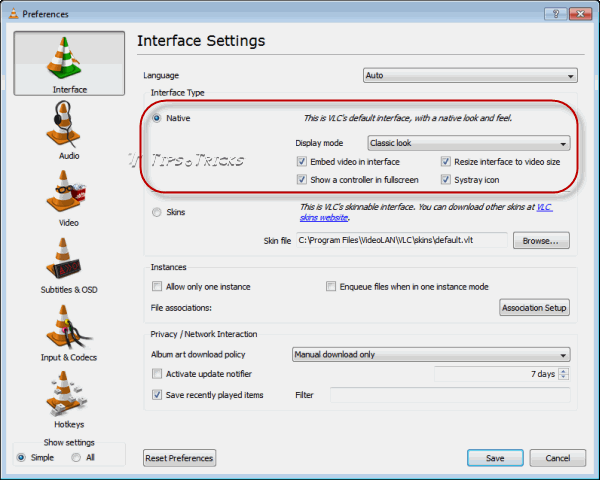
2. Go to Tools > preferences (or press Ctrl+P)

At main interface settings, you’ll notice “Native” interface type selected. This is your classic theme that you’ve been seeing since day one. Now let’s change it to the theme that’s already present under the directory where VLC is installed.
3. Just select the “Skins” radio button. You’ll notice that in skin file location:
“C:Program FilesVideoLANVLCskinsdefault.vlt”
…is already selected (if it’s not then change to this location). That’s the skin which comes with the setup.

4. Save the preferences.
5. Close VLC and launch it again.

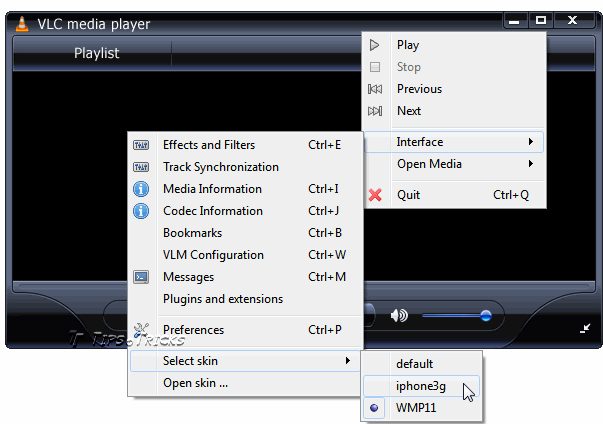
You’ll see a new blackish look of VLC media player with shiny buttons 😀
How to Download and Apply VLC skins
There are dozens of skins are available now at VLC official Skins page.
1. Just download the one you like and save it in this directory of your hard drive:
C:Program FilesVideoLANVLCskins
(C: is default installation directory, if you have VLC saved in other than C: drive then change C with the letter of the drive where it is installed in your system)
2. Open VLC and press Ctrl+P to open preferences.
3. Click Browse button beside skin file location and browse to the folder:
C:Program FilesVideoLANVLCskins (where we’ve just downloaded new skin)
4. Select it, Save the options.
5. Close and reopen VLC to see the new skin.
Now this is how you apply new skins to VLC. If you want to quickly switch between (installed) skins then:
1. Right click anywhere on VLC
2. Choose Interface > Select Skin > [Skin Name].

Now go and try giving your same old VLC media player a new look with different skins! 🙂


