Connect with us

Desktop Tools

Download BitDefender Total Security 2010 Beta 2 : Test, Report and Win!


Advertisement

BitDefender is currently rated as the the #1 antivirus and Internet Security Software according to many siteS like TopTenreviews.com

Currently BitDefender 2009 series is the Final and stable release.
But they have started testing their new Beta BitDefender Total Security 2010.

And Just Like they have been doing with all of their previous Beta products, they are again with the Beta Campaign for 2010 products, where anyone can join, test their new products, review them, submit/report bugs and Earn Prizes! 🙂

BitDefender-Total-Security-2010-Beta2-screenshot-Intermediate-Mode

Intermediate Mode – Click the screenshot to see the full preview in new window

These are the currently active BitDefender Beta campaigns:

* BitDefender Total Security 2010 Beta
* BitDefender for Mac 2009 – Beta Product Concept Campaign

The most active beta testers involved in BitDefender Beta Campaigns will be rewarded for their effort with interesting prizes.

The more you find and report the bugs, higher the chances for you to win.

What are the Prizes?

These are Prizes that they are giving away:

* 1 x eee PC
* 1 x Nintendo Wii Console
* 1 x iPod Touch
* 100 x BitDefender Total Security 2010 1 year/1 PC License Key.

To take part in the Beta Testing contest, visit Bitdefender Beta Center and sign up for an account (if you currently don’t have any) and you will see the download links for the beta products after signing in.

After Signing in, you can see:

– Download Links
– Test Cases
– Known Issues so far submitted by users and officially reported bugs.
– List of Top Users who submitted bugs.

To report a bug, Click Add Bug/Issue button in the dashboard there.
More details about submitting a bug, are already written there.

I am also giving here the Direct Download links for the Beta Products. These are the same links given there at Beta Center. You may click these links for one click downloading.

Download BitDefender Total Security 2010 Beta – 32 Bit

Download BitDefender Total Security 2010 Beta – 64 Bit


UPDATE: BitDefender 2010 is out of beta now and final products are out now.
Download Latest BitDefender 2010 Products final versions

What’s New?

Well definitely lots of bugs have been fixed and may more new features are added.
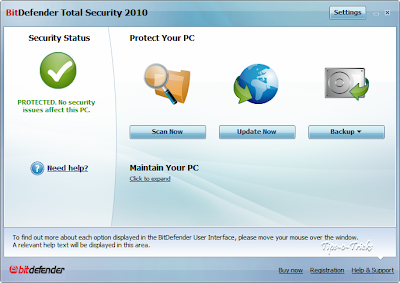
I liked the newly designed UI. Its much more user friendly and shiny 😉

There’s one more view UI mode is introduced with this BETA, the “Novice Mode”.
Beside “Intermediate” and “Advance” mode, Novice mode with just 3 buttons at main UI, are specially introduced for beginners.

BitDefender-Total-Security-2010-Beta2-screenshot-Novice-Mode

Novice Mode – Click the screenshot to see the full preview in new window

My Experience with the Beta:

I’ve been using BitDefender Total Security 2010 Beta 2 for past 15 days on my XP SP2 and having no issues with it.
I wish it could show me some problems, so I can report them…but No!
Its just running absolutely fine.

– No bugs, No system Slow downs whatsoever.
– No issues with updates.
– In fact Scan time is greatly reduced and Its kinda more responsive.

BitDefender-Total-Security-2010-Beta2-screenshot-Advance-Mode

Advance Mode – Click the screenshot to see the full preview in new window

But if you are Windows 7 user, you might face some issues, and in fact most of the bugs submitted at Beta Center are from Windows 7 users.

Note: If you are using BitDefender in your system right now, you need to uninstall the current version completely, restart the system, and then install the Beta version.


UPDATE: BitDefender 2010 is out of beta now and final products are out now.
Download Latest BitDefender 2010 Products final versions

Continue Reading
Advertisement
Comments

Desktop Tools

Smallest Antivirus to Automatically Remove Autorun.inf Virus from USB Flash Drives

Autorun.inf is not very harmful but still the most annoying virus of all which travels through flash drives. There’s a nifty tool designed specifically for this purpose – to remove Autorun.inf Virus from USB drive!

This virus automatically executes itself as soon as the infected flash drive is inserted into a system. When user double clicks the infected drive, autorun.inf with associated (hidden) .bat files infects all the partition of the system and autorun.inf is copied to all the drives.

Although this can be prevented through standard antivirus software but there’s a dedicated antivirus made specially to remove autorun viruses called Autorun Virus Remover.

Remove Autorun.inf Virus

Remove Autorun.inf Virus

Autorun Virus Remover provides protection against any malicious programs trying to attack via USB drive. When a USB device is inserted into your computer, Autorun Virus Remover will automatically scan it, block and delete autorun virus, trojans, and malicious code. Also, it can detect and remove USB virus such as autorun.inf virus in your computer.

Remove Autorun.inf Virus with Autorun Virus Remover can also remove the autorun virus due to which you can’t open your hard disk and USB drive (Pen drive, Memory card) by double clicking. Autorun Virus Remover USB antivirus software to permanently protect offline computer against any USB virus without the need for signature updates. This light and easy to use solution is compatible with all version of Windows and doesn’t slow down your computer at all.

Download Autorun Virus Remover

Continue Reading

Desktop Tools

Snappy: All in One Driver Installer For All Your System Drivers

snappy-driver-installer

Snappy system driver installer is a freeware for Windows which is an All in One Driver Installer and can be used as a complete solution to install all types of drivers on your system. There are two main sources which are supported by the program namely driver packs and local folders. The program is capable enough to pick the drivers automatically from the folder where you kept them and bring it to use at any given time.

snappy-driver-installer

The computers who have a weak or unreliable internet connection can avail the services of this program as it can install all the drivers without it. To start installing drivers on your computer, go to the updates option which can be found on the top and download the index file by checking on the option ‘Check only needed for this PC’ and then click on accept. This index file will add all the relevant information to the software. The program then works by checking for all the missing drivers and updates for the already-installed programs on the system.

You are also free to download all the driver packs, however, which is not recommended by the experts. You only need to do this if you need to create a completely portable version of a particular program on the computer which, by default, includes all the drivers. There is one thing to note that you will have to download nearly 9 GB of data in that case.

sdi

As soon as you are done downloading, the main interface of the program will show the updated driver information afterward. You can also enable the expert mode present on your left where you will be able to use filters to customize the selected option. You are also free to disable the updates which you think are, in no way, better than the ones already installed.

Before selecting the drivers which need to be updated, hover on each device to get information about each device’s already installed driver and the update the program wants to install. The information may consist of the update’s version, device’s manufacturer’s name, hardware IDs, etc. It is quite beneficial to give some time to these facts as there may be some updates which are not suitable for the device or are falsely identified. Once you are done with all these important steps, the Snappy Driver Installer will start downloading the selected driver updates for your system, installing afterward.

Continue Reading

Desktop Tools

Easiest Way to Recover Deleted Photos and Text Messages From Phone For FREE

Recover deleted photos from phone

Recover deleted photos from phone easily with the world’s number one android file recovery software named Wondershare Dr.Fone. It is a tool which is used worldwide for recovering files and data from android tablets and phones. The tool is capable of retrieving audio files, Whatsapp messages, videos, call history, contacts, photos, text messages and a lot more that you lost accidentally or due to the ROM flashing or OS crash. The tool supports about 200 android devices and many android versions.

Recover deleted photos from phone


How To Recover Deleted Photos From Phone And Other Data

Dr. Fone is very beneficial in recovering files on android devices and can retrieve deleted text messages too. However, if the tool is not dealt properly, the software will not be able to recover all the files properly. Before beginning the process of recovery, the following tips should be considered to increase the success rate positively.

  • First of all, if you find out that some of the files have gone missing on the phone or a list of data is deleted accidentally from the phone, stop using the device instantly. In android or other OS, the data is actually not blown away but is kept in the phone to be rewritten by some other files. For this particular reason, if the device is kept working on, that data gets overwritten by the recent changes in the phone and ultimately, disappears forever.
  • Secondly, look for a computer as soon as possible and start the process of recovery. Don’t forget, the sooner it is, the better it is. Download the recovery software by Wondershare i.e. Dr. Fone for android. For further information, follow the following downloading process.

How To Download

There are more than one way to download Wondershare on your phone. You can either go to the product page to find the app link or simply click the download option on the top of the page to get Dr.Fone on your phone. Once downloaded, your phone will offer an installation package. The download button is also featured in the bottom of the page.

How To Install

Once you have downloaded, search for the installation package on your system. Double tap on the .exe file to run the setup and click on the install option to start the recovery process. The installation process will take approximately a few minutes. Once there, the Start Now option should be clicked to launch the software.

Continue Reading

Trending